


Site Prep & Grading
Remove all organic material, including grass, roots, and leaves. Check the slope of the soil next to the structure. The ideal grade is 1/8” per linear foot, sloping away from the house or structure to ensure proper drainage.
If you have an existing sprinkler system, you may choose to keep it in place for periodic cleaning and flushing of the Pup-Grass®. Sprinklers can also be convenient on hot days to help cool the surface.
Mark the installation area using marking paint or chalk. If you plan to remove the sprinkler system, cut the risers and cap them, making sure they are set low enough so the base materials will fully cover them. Check the existing soil height and excavate as needed to allow for 2″–3″ of base material. If you have clay soil, lime may be added to help neutralize the clay. This is often more cost-effective than removing and hauling away large amounts of soil.
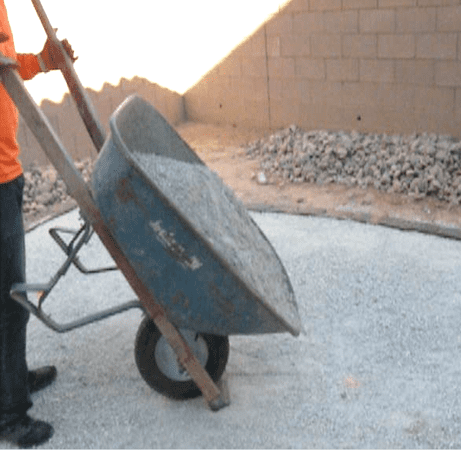
Install Base Material
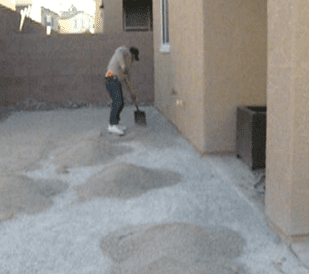
- Once vegetation is removed and the soil is neutralized or excavated, cover the area with base material. Place wheelbarrow piles 2–3 feet apart Spread evenly with a shovel or rake
- Level and compact the entire area
- Follow the established slope
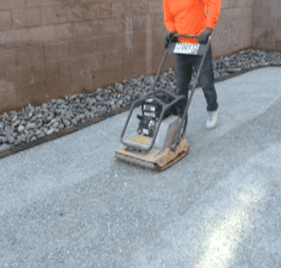
Proper compaction
- Lightly moisten the base material
- Compact to 80–85%
- When ordering base material, request:
- Use a drum roller or vibrating plate compactor
Final Leveling
- Compact with a vibratory plate compactor
- Lightly mist with water
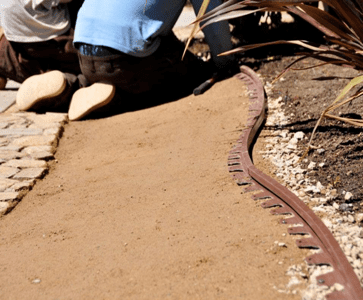
- Apply ASTM C33 washed concrete sand to fill small voids and create a smooth surface.
- Use only enough to level imperfections
- Perform a final compaction pass
Once the base is fully compacted, install edging by nailing it directly into the finished base.
- Bender board
- Poured-in-place concrete
- Brick
- WonderEdge™ (recommended — installs over finished base with no digging)
Pre-Cut for Fit
Before stretching, pre-cut the grass so it roughly fits the entire area. Do not worry about perfect edges yet. Final trimming will be done after the turf is fully stretched and secured.
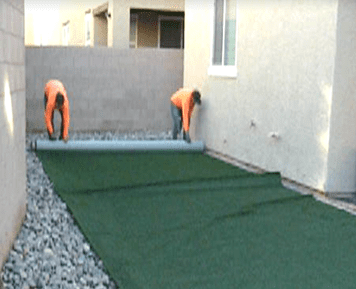
Positioning & Initial Anchoring
Unroll the Pup-Grass® over the prepared base. Make sure the pile direction faces toward the house. This provides the best visual appearance, similar to freshly vacuumed carpet when viewed from windows. Once positioned, roughly trim away excess material. Final trimming will be completed after stretching and securing. Ensure the grain direction is consistent across all sections. Begin anchoring along one straight edge such as a wall, fence, patio, or edging. Secure this first edge with nails placed temporarily, ensuring the turf lies flat and wrinkle-free. Ensure the grain direction is consistent across all sections. Begin anchoring along one straight edge such as a wall, fence, patio, or edging. Secure this first edge with nails placed temporarily, ensuring the turf lies flat and wrinkle-free.
Lay the Pup-Grass®
Once one side is anchored, you can begin the stretching process using a turf kicker, a tool designed to pull the turf taut. Position the kicker about 6 inches from the anchored edge, with the teeth gripping the turf backing. Apply pressure with your knee to stretch the turf away from the anchored side. Work in sections, stretching small areas at a time. After stretching a section, immediately secure it with nails to hold the The tension in place. This methodical approach ensures that the turf remains uniformly stretched across the entire area.
Handling Wrinkles and Air Pockets
Using the Turf Kicker
Special attention is required for corners and curves, which can be tricky to stretch evenly. Begin by stretching the turf across the longest straight edges first, then move on to the corners. Pull the turf tightly into the corners, using the kicker to eliminate any slack. For curved areas, you may need to make small relief cuts in the turf backing to allow it to lay flat. Take your time with these adjustments to avoid any visible imperfections.
Final Stretch and Rolling
Once all sections are stretched and secured, go over the entire area with the kicker one last time, focusing on any spots that might need a little extra tension. Afterward, use a heavy roller to press the turf down evenly across the surface. This step is crucial for removing any remaining air pockets and ensuring that the turf adheres properly to the base. Rolling also helps the turf settle, creating a firm, even surface
Infill the Final Step
As you work, continuously check for any wrinkles or air pockets. If you find any, lift the turf slightly in that area and use the kicker to stretch it again before securing it. Be sure to apply even pressure with the kicker to avoid overstretching certain sections, which could cause uneven tension or even tear the turf.e recommend only one type of infill for dogs and that is 100% Pure Zeolite. The fastest way to apply it is using a fertilizer spreader use enough infill to fill the area from the backing to ¾ of the way up the blade. You can also pour little mounds 4’-5’ apart and use a leaf blower to spread and the infill. We recommend using ¼ lb of infill per sq ft . Once to finish take a hose and clean the dust off the Pup-Grass.
